display login status Section 11, Lecture 50
ログイン状態か表示する方法

app/catalog/templates/layout.htmlに以下を追記する。
<a href="">
    {% if current_user.is_authenticated %}
        Logged-In as <b style="color: deeppink"> {{ current_user.user_name.title() }} </b>
    {% else %}
        Not Logged-In
    {% endif %}
</a>
実際にやってみる
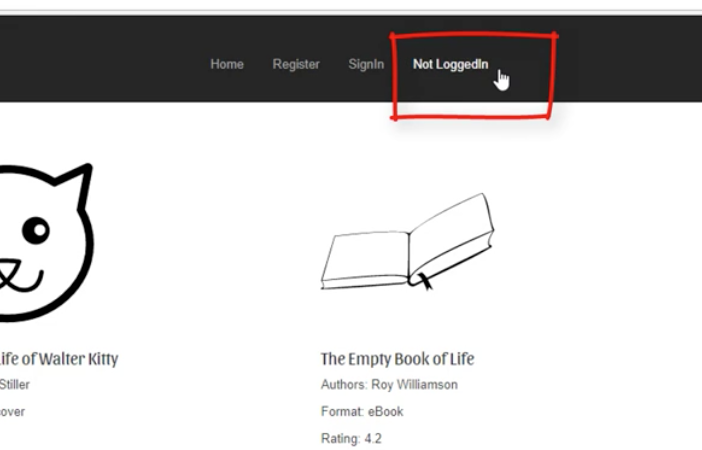 ログイン状態の場合
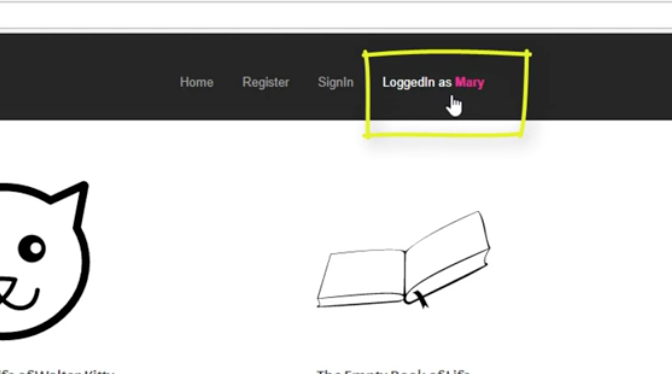
よくわkラン letting users login Section 11, Lecture 49
ログイン機能を改善する。
models.pyに以下を追記する ユーザーが入力したpasswordを渡すことでdbにあるハッシュと一致するかをチェックする。
    def check_password(self, password):
        return bcrypt.check_password_hash(self.user_password, password)
もし、一致しなかった場合はroutes.pyで一致しませんでしたとflashメッセージを表示させる。
user = User.query.filter_by(user_email=form.email.data).first()
user_email=form.email.dataについては、user_emailはDBの情報でform.email.dataはフォームからくる情報。
.first() でもし一致するものがない場合はnoneで返答される。
not userはもしユーザーがいない場合という意味である。
not user.check_passwordはパスワードが違う場合という意味である。
        if not user or not user.check_password(form.password.data):
            flash('Invalid Credentials, Please try again')
            return redirect(url_for('authentication.do_the_login'))
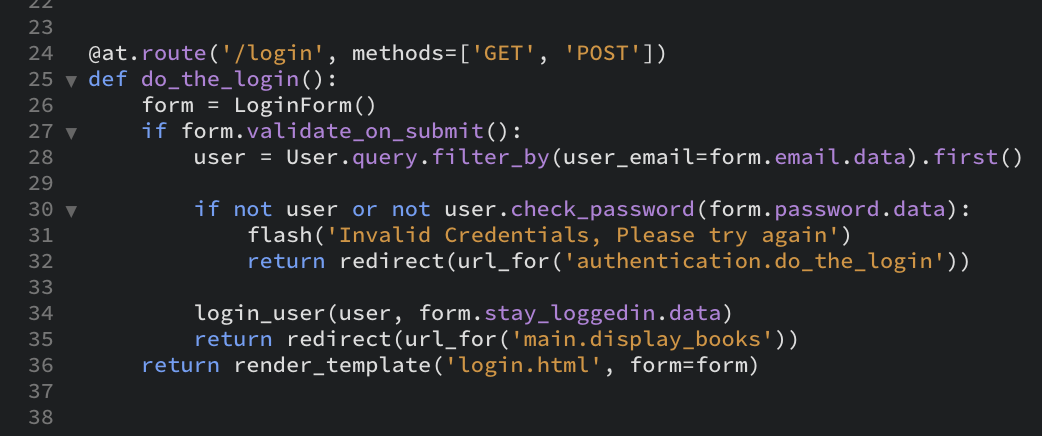
一致した場合はリダイレクトさせる。
        login_user(user, form.stay_loggedin.data)
        return redirect(url_for('main.display_books'))
return redirect(url_for('authentication.do_the_login'))とする事でもう一度ログインをさせることが出来る。init.pyにイニシャライズする。
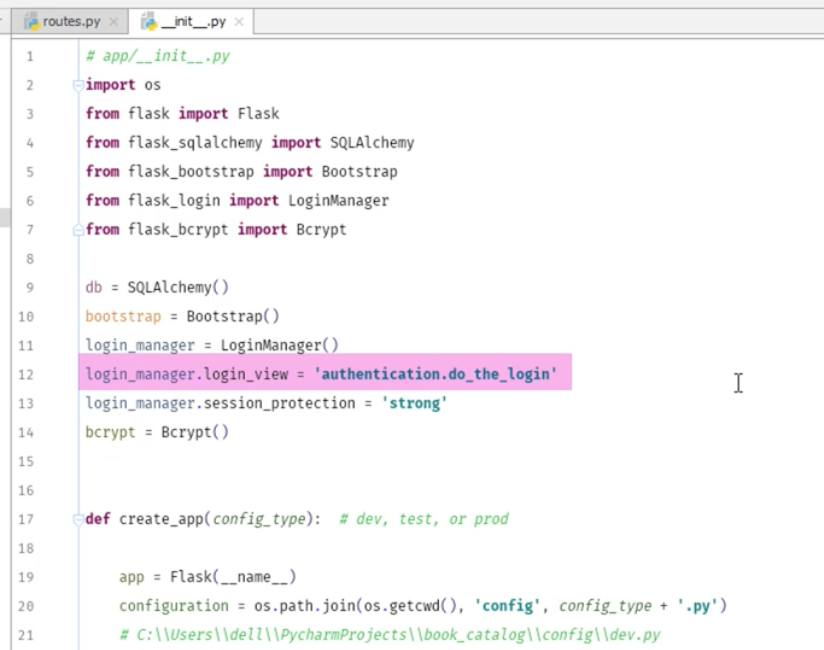
session_protectionをstrongにする
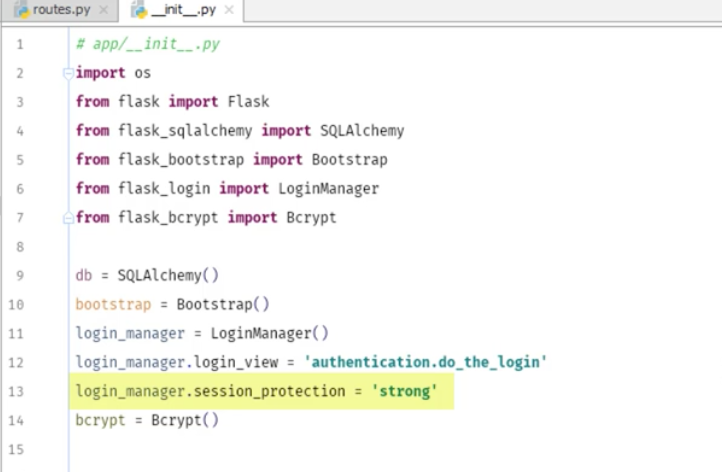
SESSION_PROTECTION setting to None, "basic", or "strong"の3段階である。 https://flask-login.readthedocs.io/en/latest/
Flask-loginの説明 login manager and usermixin classes Section 11, Lecture 48
Flask Loginに関して

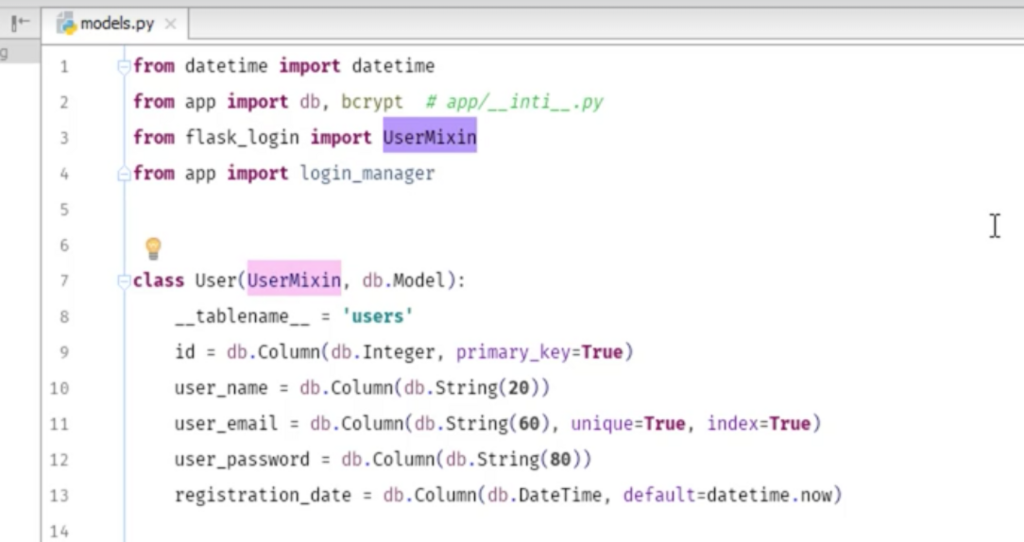
models.pyに以下を記述することで
login managerのloaderが使える。
int(id)にする必要がある。
今回はこの4つについて学ぶ
1. LoginManager
2. @login_manager.user_loader
3. load_user()custom method
4. UserMixin()
auth/forms.pyに関して
BooleanFieldを使うと次回以降自動ログインをすることが可能になる。
class LoginForm(FlaskForm):
    email = StringField('Email', validators=[DataRequired(), Email()])
    password = PasswordField('Password', validators=[DataRequired()])
    stay_loggedin = BooleanField('stay logged-in')
    submit = SubmitField('LogIn')
- LoginManager
- @login_manager.user_loader
1.2.についてはよくわからない。
models.pyに以下を記述する事でセッションを行うことが出来る。
@login_manager.user_loader
def load_user(id):
    return User.query.get(int(id))
- UserMixin()
ユーザーモデルに UserMixin を追加することでFlask-loginが使えるようになるらしい。
重複確認 writing custom validations Section 11, Lecture 47
すでにデータが存在しているかを確認する方法
forms.pyで文字数や有効性を確認をしていた。
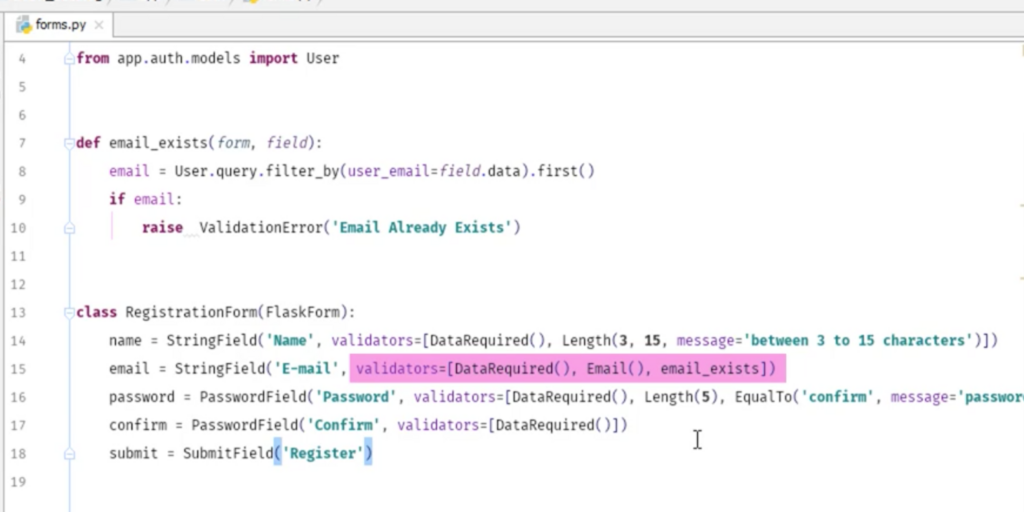
forms.pyに関数を作る→forms.pyのチェック機能に重複確認関数を追加する必要がある。
def email_exists(form, field):
    email = User.query.filter_by(user_email=field.data).first()
    if email:
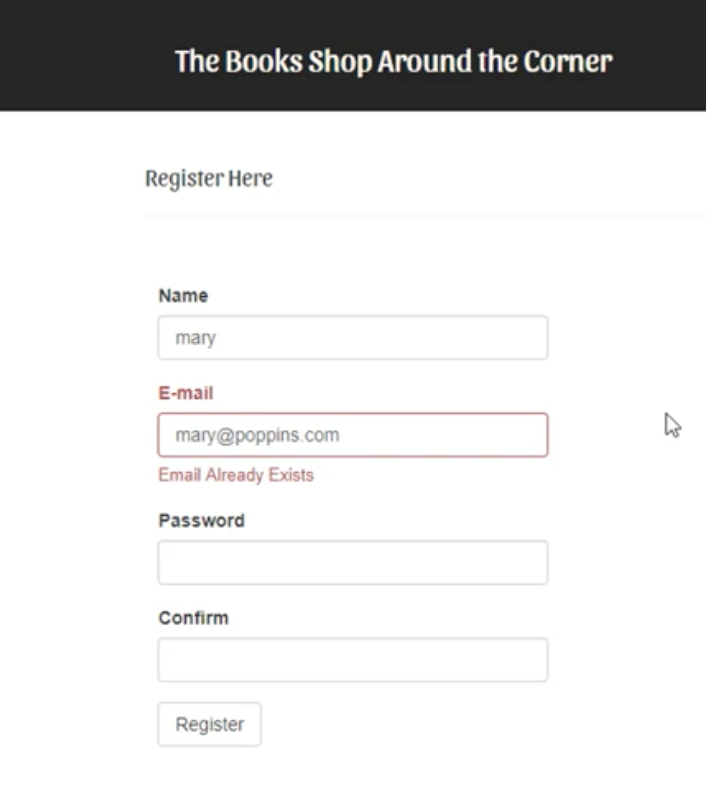
        raise ValidationError('Email Already Exists')
forms.py側は email_existsを追加するだけである。
変更後:email = StringField('E-mail', validators=[DataRequired(), Email(), email_exists])
変更前:email = StringField('E-mail', validators=[DataRequired(), Email()])
また、from app.auth.models import Userのdbをimportして置く必要がある。
実際に試すとこうなる。
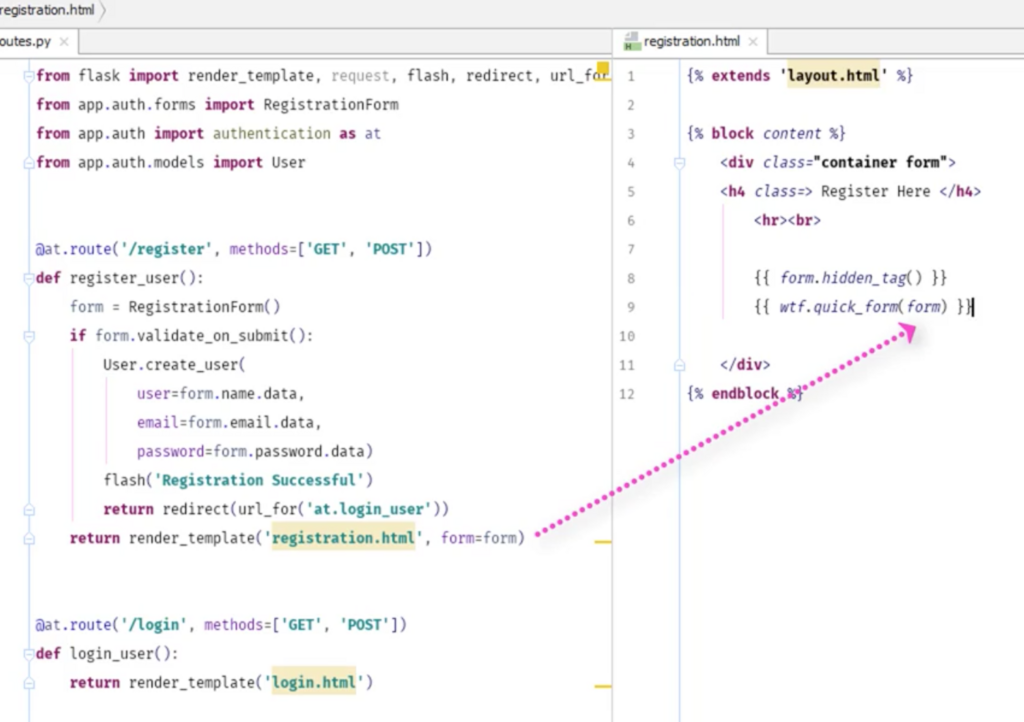
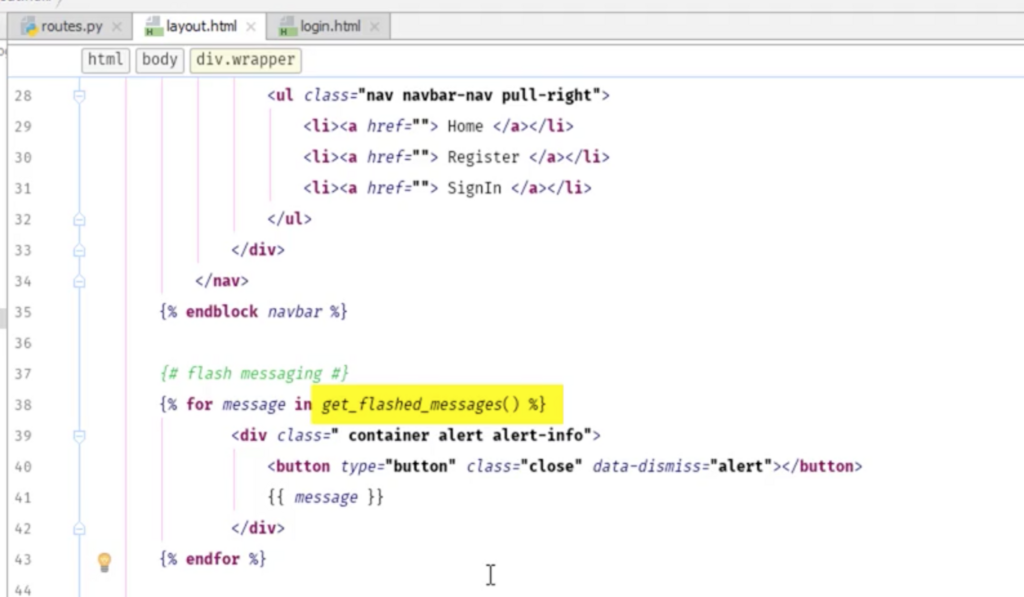
ユーザー登録のコード作成1 capturing user credentials using forms part 1 Section 11, Lecture 45
route.pyのまとめ
次の順で処理される。
1. localhost/registerにアクセスする。
2. return render_template('registration.html', form=form)でページを表示させる。
3. HTMLからPOSTでname,emai,passwordが飛んでくる。
4. if form.validate_on_submit():で問題ないかチェックする。
5. 問題なければmodel.pyのuserクラスとcreate_user関数を呼び出してdbで保存する。
4. returnがTrueならflash('Registration Successful')が表示する。
5. returnがFalseならリダイレクトするreturn redirect(url_for('authentication.do_the_login'))
順位に説明
GETでとってフォームを表示する。
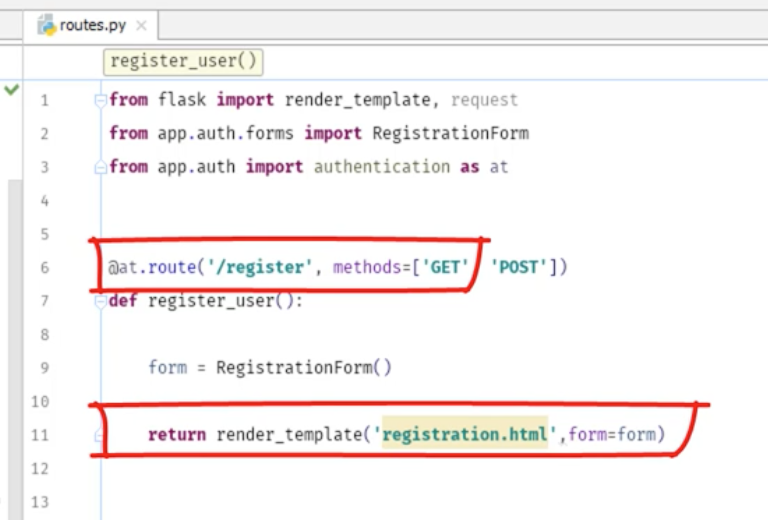
次にIF文を追加してvalidationでチェックする。
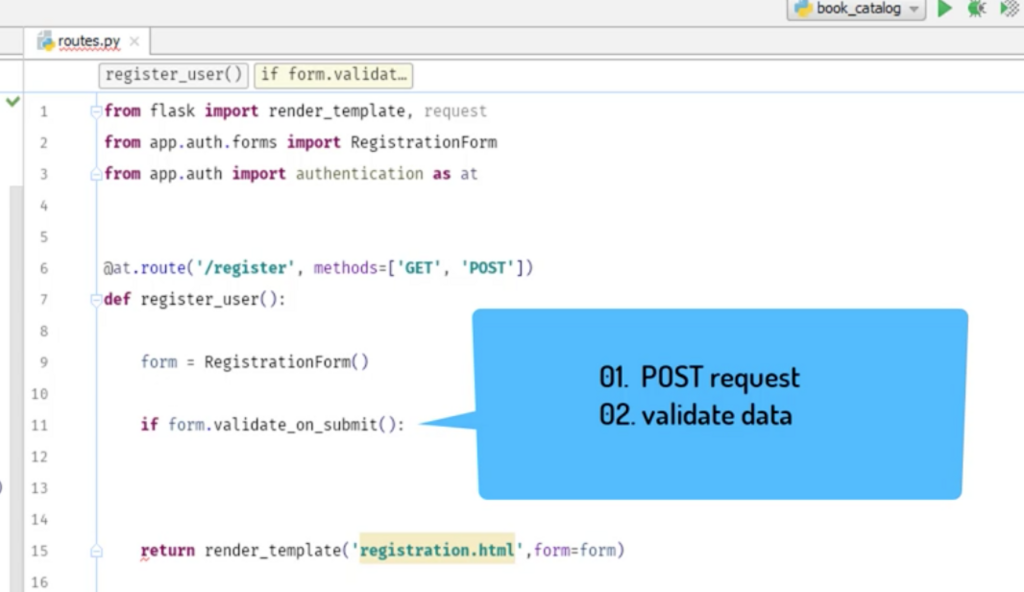
userクラスをimportする
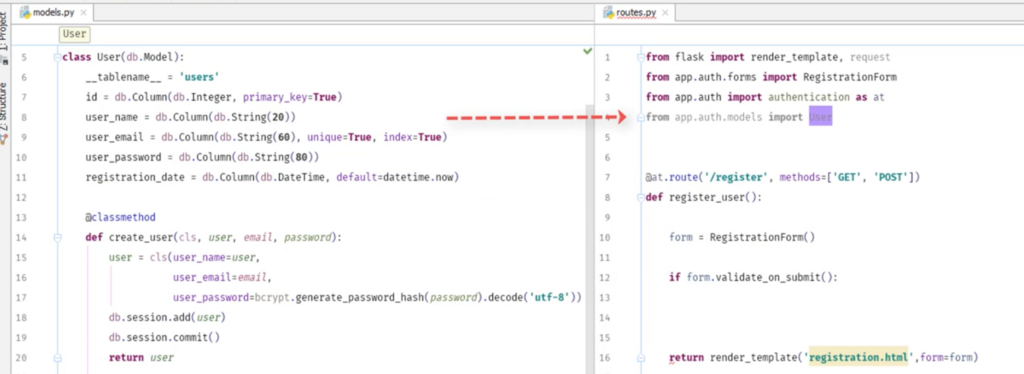
forms.pyからroutes.pyにデータが送られる。
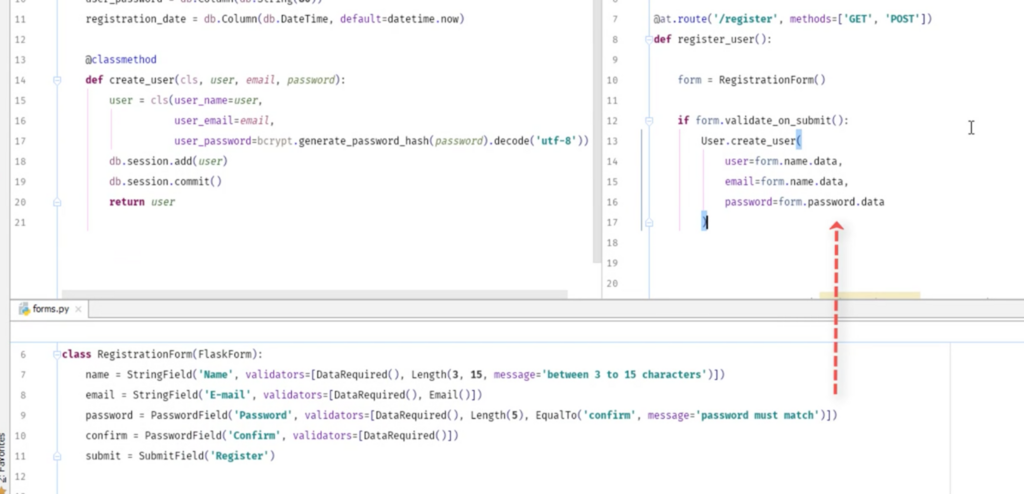
flashをimportするとメッセージを表示させうることができる。
フォームの作り方 adding data validation to the registration process Section 11, Lecture 44
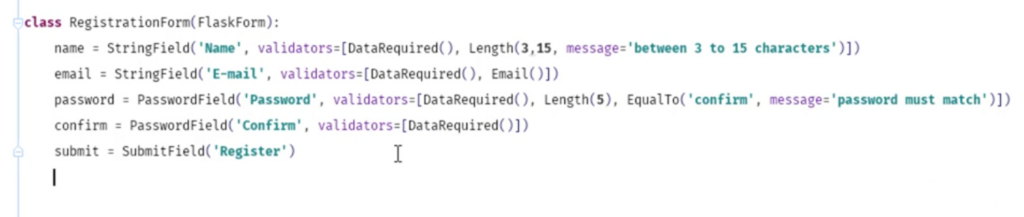
validatorsを使う事でルール通りしか受け付けないようにする。
まとめ
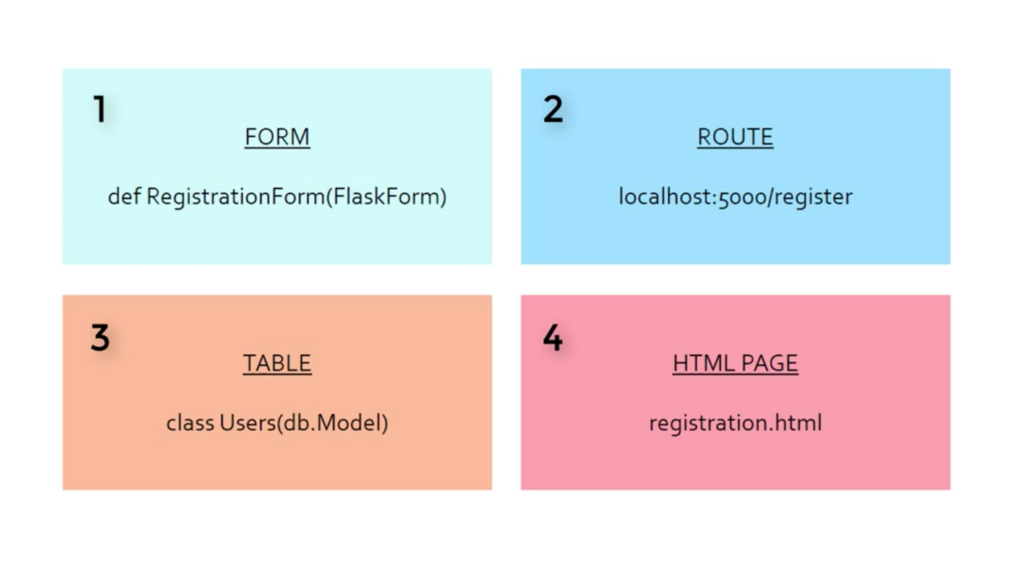 この4つの順に作ればフォームはできる。
1.フォームを作る
2.routeで登録する
3.dbのテーブルを定義する
4.htmlを作成する
